
Upgrade Your Email with Stationary
Make a memorable impression. Using Stationery, a little known feature of Apple Mail, you can create personalized messages like announcements, invitations and greeting cards with a few simple clicks.
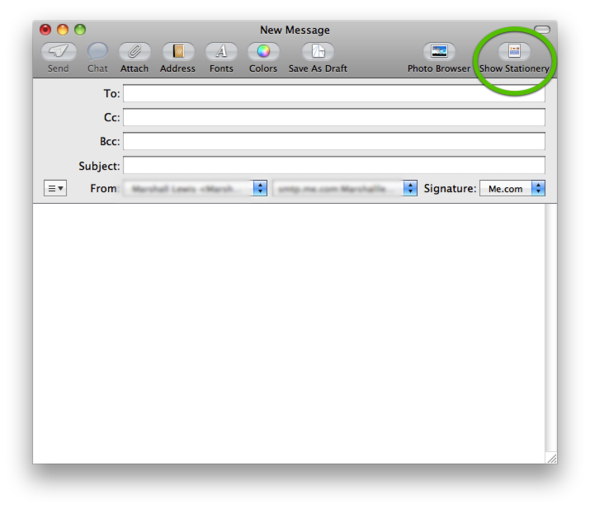
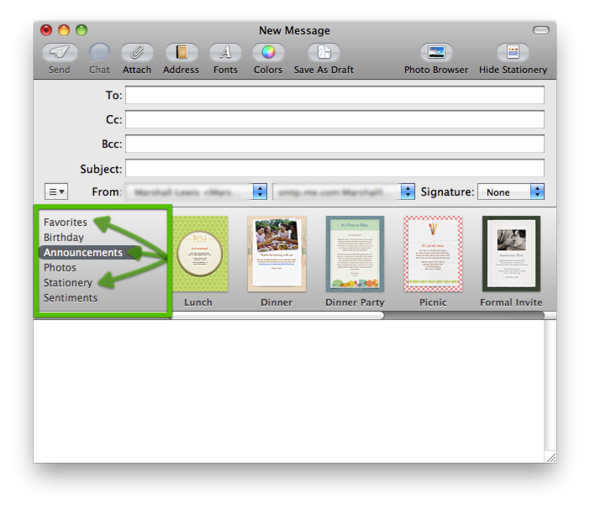
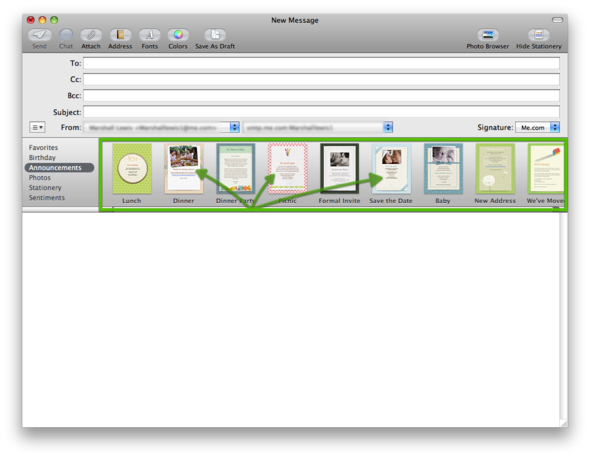
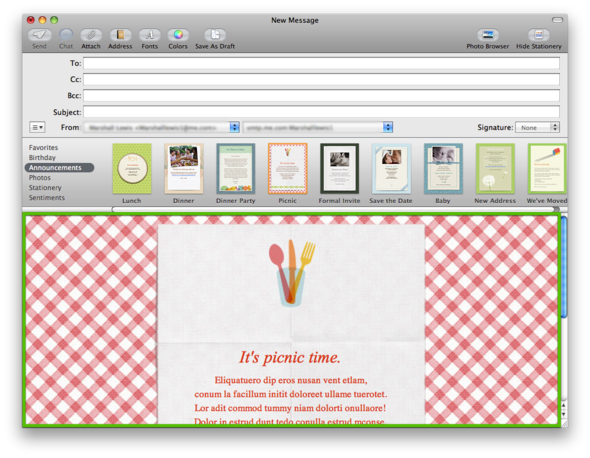
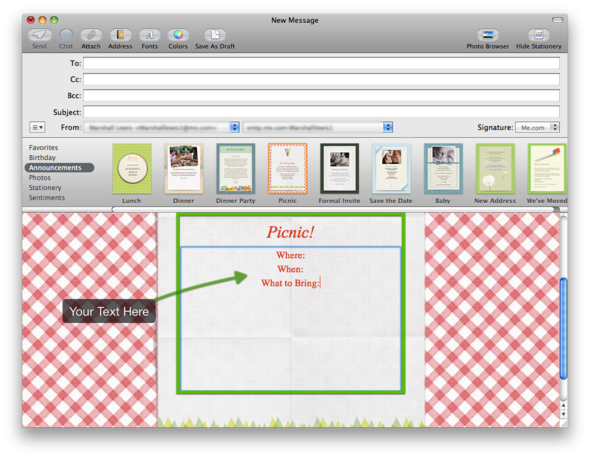
Just start a new Mail message and click on the Show Stationery icon in the upper right corner. Then choose from a variety of colorful templates in categories like Announcements, Photos or Sentiments. Click on a template to insert it into the body of your message. From there, you can personalize it by changing the wording and font styles.
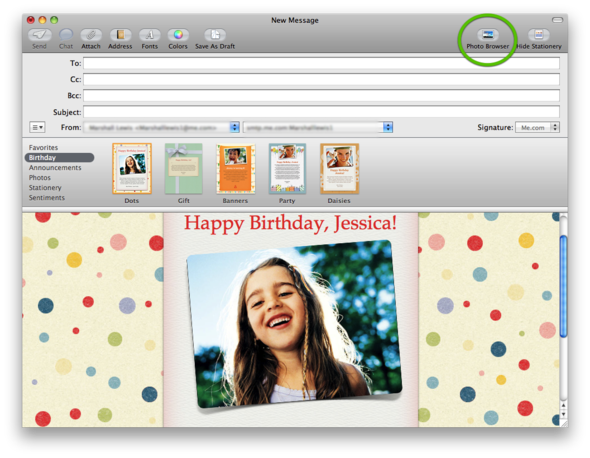
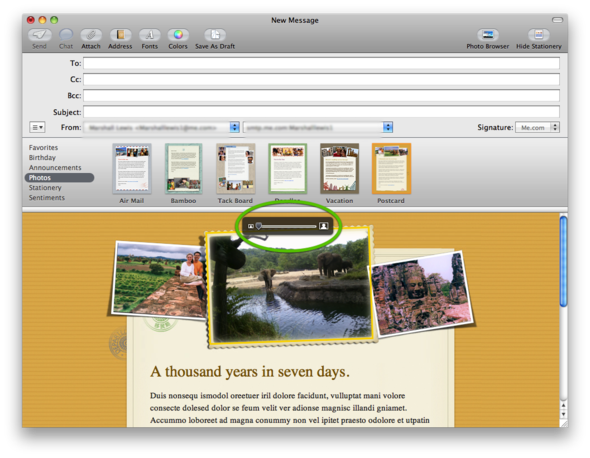
Some templates are also photo ready. Access your iPhoto library by clicking on the Photo Browser icon in the right corner. Then drag photos right into your template. Once a photo is in place, double click to adjust its size and placement.
For even more variety, third-party stationery apps like Equinux’s Stationery Pack offer hundreds of templates for both personal and business messages. Personal greetings include creative templates for holiday cards, party invitations, club newsletters and more.
The business package includes professional templates and the option to add company logos, personalized signatures and other professional touches. With a stationery tool, business messages can become an extension of your brand with your logo, colors and messages present in every email you send.
Whether sending a fun greeting card or an important professional message, stationery can transform your email messages from simple words into beautiful messages that make an impact.
Follow these step-by-step instructions to quickly get up-to-speed on using Apple Mail stationery.
1. Create a new mail message
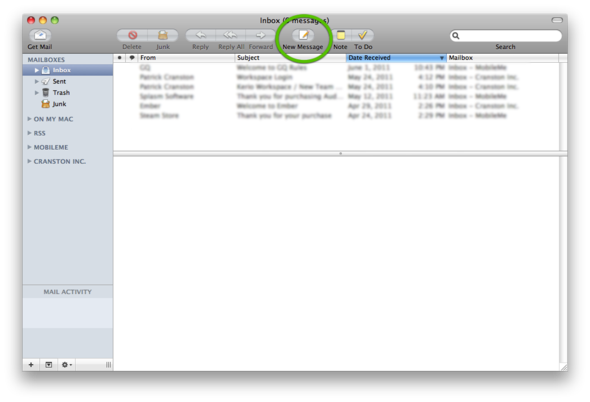
2. Click on the show stationary button
3. Pick from the different types of stationary
4. Select one of the stationary templates
5. The template will fill your message screen
6. Change out the default text
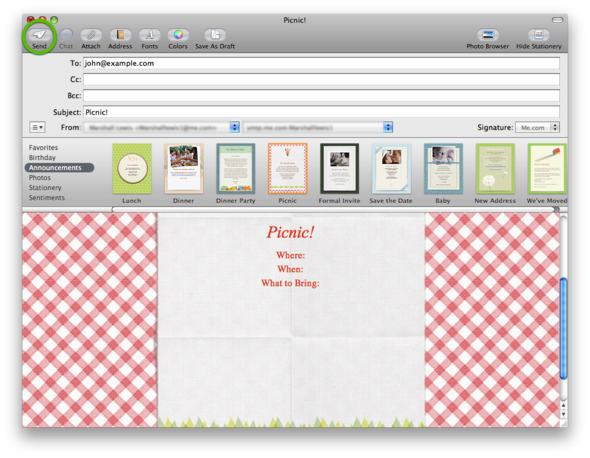
7. Send your message
Adding photos to a stationary template
1. Select the Photo Browser button in the menu bar of the mail message.
2. Select a folder from the drop down menu in the photo
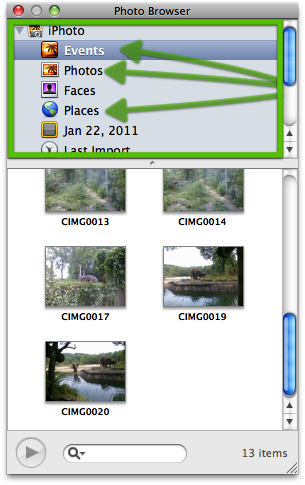
3. Select a picture
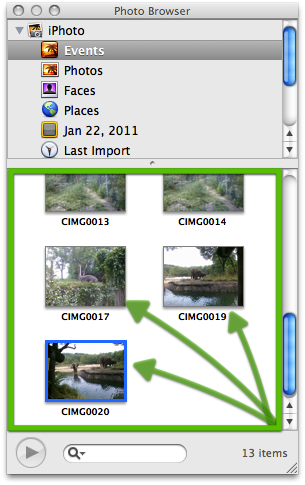
4. Click and drag in into the place holder on the template
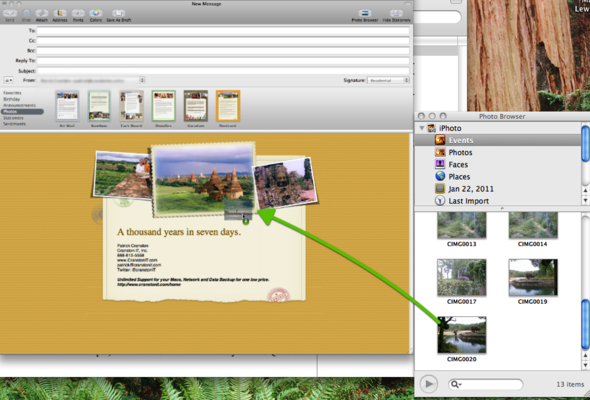
5. Adjust the size and placement accordingly
Some templates are also photo ready. Access your iPhoto library by clicking on the Photo Browser icon in the right corner. Then drag photos right into your template. Once a photo is in place, double click to adjust its size and placement.
For even more variety, third-party stationery apps like Equinux’s Stationery Pack offer hundreds of templates for both personal and business messages. Personal greetings include creative templates for holiday cards, party invitations, club newsletters and more.
The business package includes professional templates and the option to add company logos, personalized signatures and other professional touches. With a stationery tool, business messages can become an extension of your brand with your logo, colors and messages present in every email you send.
Whether sending a fun greeting card or an important professional message, stationery can transform your email messages from simple words into beautiful messages that make an impact.
Follow these step-by-step instructions to quickly get up-to-speed on using Apple Mail stationery.
1. Create a new mail message

2. Click on the show stationary button

3. Pick from the different types of stationary

4. Select one of the stationary templates

5. The template will fill your message screen

6. Change out the default text

7. Send your message

Adding photos to a stationary template
1. Select the Photo Browser button in the menu bar of the mail message.

2. Select a folder from the drop down menu in the photo

3. Select a picture

4. Click and drag in into the place holder on the template

5. Adjust the size and placement accordingly
